Introduction to Elementor Pro
Elementor Pro is a powerful page builder plugin for WordPress. It allows users to design and customize their websites without needing to know how to code. With its drag-and-drop interface, pre-built templates, and extensive library of widgets, Elementor Pro makes it easier than ever to create stunning websites.
Why Clone Website?
Cloning a website can be beneficial for several reasons:
- Learning: Understanding how certain design elements and functionalities work.
- Efficiency: Quickly replicating a design without starting from scratch.
- Consistency: Ensuring a uniform design across multiple websites.
Prerequisites
Before you start, ensure you have the following:
- A WordPress website with Elementor Pro installed and activated.
- Access to the website you wish to clone (to gather design inspiration and assets).
Step-by-Step Guide to Clone Website with Elementor Pro
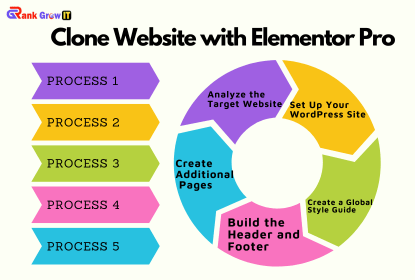
Step 1: Analyze the Target Website
The first step in cloning a website is to thoroughly analyze the target site. Look at the structure, design elements, color schemes, fonts, and any special functionalities.
- Structure: Note down the layout of different pages (e.g., header, footer, main content, sidebar).
- Design Elements: Identify buttons, forms, sliders, images, and other elements.
- Color Scheme and Fonts: Use tools like Chrome’s DevTools or ColorZilla to identify the exact colors and fonts used.
- Special Functionalities: Pay attention to any unique features like animations, pop-ups, or interactive elements.
Step 2: Set Up Your WordPress Site
Ensure your WordPress site is ready to go. Install a clean WordPress theme that works well with Elementor, such as Astra or GeneratePress. These themes are lightweight and highly customizable, making them perfect for Elementor.
- Install WordPress: If you haven’t already, install WordPress on your hosting server.
- Install and Activate Elementor Pro: Download Elementor Pro from the Elementor website, install it on your WordPress site, and activate the license.
- Install a Compatible Theme: Go to Appearance > Themes > Add New and search for Astra or GeneratePress. Install and activate the theme.
Step 3: Create a Global Style Guide
Consistency is key when cloning a website. Elementor Pro allows you to set global styles to ensure uniformity across your site.
- Global Colors: Go to Elementor > Settings > Site Settings > Global Colors. Set the primary, secondary, text, and accent colors to match those of the target website.
- Global Fonts: Under Site Settings, go to Global Fonts. Set the primary, secondary, and text fonts according to your analysis.
Step 4: Build the Header and Footer
Headers and footers are essential components of any website. Elementor Pro’s Theme Builder makes it easy to create and customize these sections.
- Header:
- Go to Templates > Theme Builder > Add New > Header.
- Use the Elementor editor to recreate the header from the target site. Add elements like the logo, navigation menu, and any other items present in the original.
- Use the Responsive Mode in Elementor to ensure the header looks good on all devices.
- Footer:
- Similar to the header, go to Templates > Theme Builder > Add New > Footer.
- Design the footer to match the target site, including any widgets, links, and social media icons.
Step 5: Design the Home Page
The home page is often the most complex and visually appealing part of a website. Start by creating a new page and editing it with Elementor.
- Hero Section:
- Add a new section with a background image or color that matches the target site.
- Insert a heading and subheading, using the global fonts you set earlier.
- Add a call-to-action (CTA) button and link it appropriately.
- Content Sections:
- Break down the home page into sections. Use Elementor’s widgets to add text, images, videos, and other elements.
- Pay attention to padding, margins, and alignments to ensure the design looks clean and professional.
- Special Elements:
- If the target site has sliders, carousels, or other interactive elements, use Elementor Pro’s widgets to replicate them.
- Use the motion effects and interactions options in Elementor to add animations and hover effects.
Step 6: Create Additional Pages
Once the home page is complete, proceed to create the additional pages such as About, Services, Blog, and Contact.
- About Page:
- Add a new page and edit with Elementor.
- Use a similar structure to the target site, including sections like team members, company history, and mission statement.
- Services Page:
- Highlight the services offered, using Elementor’s icon boxes and call-to-action widgets.
- Blog Page:
- If the target site has a blog, use Elementor’s Post widgets to display recent posts.
- Customize the single post template using the Theme Builder to match the target site’s design.
- Contact Page:
- Add a contact form using Elementor Pro’s Form widget.
- Include a map, address, phone number, and any other relevant contact information.
Step 7: Optimize for Mobile
Elementor Pro makes it easy to create responsive designs that look great on all devices. Use the Responsive Mode to tweak the layout and ensure your site is mobile-friendly.
- Mobile and Tablet Views:
- Switch to mobile and tablet views in Elementor.
- Adjust font sizes, padding, and margins to ensure everything looks good on smaller screens.
- Test Responsiveness:
- Use tools like Google’s Mobile-Friendly Test to ensure your site meets mobile usability standards.
Step 8: Add Finishing Touches
Before you launch your cloned website, make sure to add the finishing touches.
- SEO Optimization:
- Use an SEO plugin like Yoast or Rank Math to optimize your site for search engines.
- Ensure each page has a unique meta title and description.
- Performance Optimization:
- Install a caching plugin like WP Rocket to improve site speed.
- Optimize images using a plugin like Smush or Imagify.
- Testing:
- Thoroughly test your site on different browsers and devices to ensure compatibility.
- Check all links and forms to ensure they work correctly.


